Personalization
IFS Cloud provides you with a range of options to personalize your environment according to your preferences.
Language Settings
Language settings allows to change the display language of your IFS Cloud Web environment.
 |
|
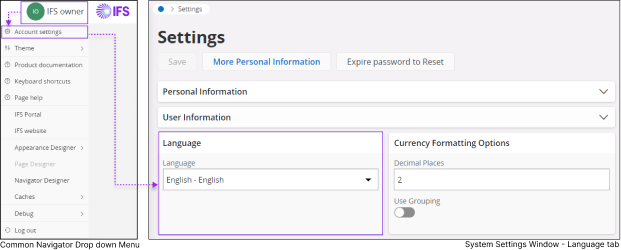
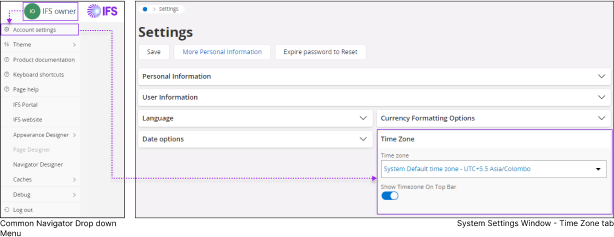
- Click the Common Navigator drop down menu and click on Account Settings to access System Settings.
- Once you are in the System Settings, go to Language tab.
- Click on the Language drop down menu to select your desired language.
- Click the Save button to apply your change.
- Once you click the Save button, system will automatically refresh to apply the new language settings.
Note: When you change the language settings, it won't affect the way the date, time, units, and number formats are displayed or formatted.
|
Currency Formatting
Currency formatting dictates how the currency values must be displayed within IFS Cloud Pages.
|
|
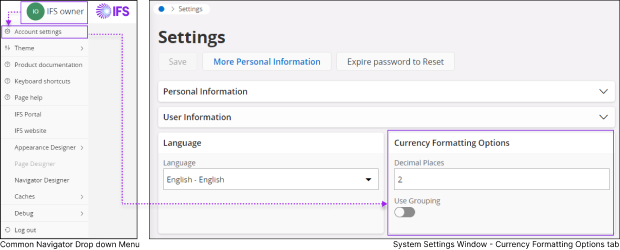
- Click the Common Navigator drop down menu and click on Account Settings to access System Settings.
- Once you are in the System Settings, go to Currency Formatting Options tab.
- Specify the number of decimal places you want to display for your currency values by entering the desired number into the Decimal Places input field.
- Enable the Use Grouping option to include a thousand separator for currency values.
|
Date Options
Date options section can be utilized to determine how date values are presented within IFS Cloud Pages.
|
|
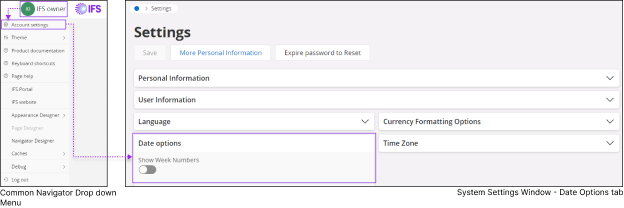
- Click the Common Navigator drop down menu and click on Account Settings to access System Settings.
- Once you are in the System Settings, go to Date Options tab.
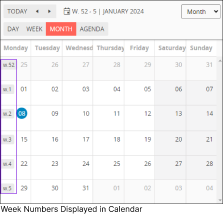
- Enable Show Week Numbers option to display the week number in date pickers & calendars.
|
Time Zone
The Time Zone section enables you to designate a specific time zone for viewing your data. Once selected, the application will display all date/time values according to the chosen time zone.
|
|
- Click the Common Navigator drop down menu and click on Account Settings to access System Settings.
- Once you are in the System Settings, go to Time zone tab.
- Click on Time zone drop down menu to view all the time zones supported by the application.
From the dropdown menu, you can choose from the following options:
- Select the System Default time zone option to display date and time data according to the time zone of the IFS Cloud Web server location.
- Select the Browser time zone option to display date and time data according to the time zone of the web browser you are using to access IFS Cloud Web.
- You can also select Show Time zone On Top Bar option to display your selected time zone on the Navigation Bar.
|
Theme
Change your IFS Cloud theme to a Light or Dark theme.
 |
|
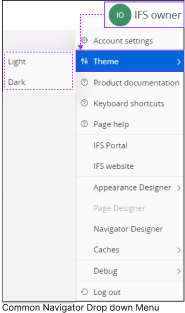
- Click the Common Navigator drop down menu and click on Theme Icon.
- Choose your preferred theme type (Light/Dark) by selecting from the two available options in the slide-out menu.
|
Displaying Data According to Different Screen Sizes
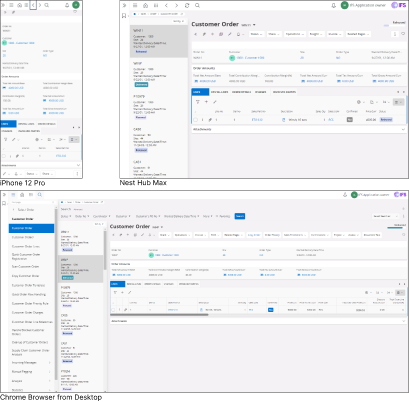
The IFS Cloud web is built to adapt and automatically adjust how data is shown based on the size of your screen.
 |
|
Example: The user is accessing Customer Order page from 3 different devices
- IPhone 12 Pro.
- Nest Hub Max.
- Chrome Browser from a Desktop.
As shown in this figure, data displayed changes dynamically with the display area of your device.
When you access IFS Cloud Web using your desktop browser, you'll notice a similar behavior: as you resize your browser window,
the displayed data in IFS Cloud Web adjusts dynamically to fit the essential information within the current size of your browser window without sacrificing clarity.
|
Expand / Collapse Sections
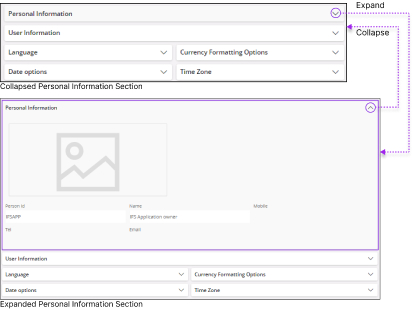
Pages in IFS Cloud are divided into subsections that you can expand or collapse based on your needs.
 |
|
 |
|
Expand |
|
To see more details within a specific section, click the Expand icon situated at the top right corner of the subsection title. |
 |
|
Collapse |
To hide or minimize details within a specific section, click the "Collapse" icon positioned at the right corner of the subsection title. |
|

